As we make the transitions to teaching yoga training online, it’s important to do it well.
Whether you are streaming or recording, here are five practical and simple tips for teaching online yoga training classes that will make a huge difference in the quality of your offering. Although these tips are for live streaming, they are also useful for those of you who are recording
1. Background
Teach your online yoga training with a clean, spacious, uncluttered background. This is easy to do; pick a wall in your house that has a good amount of space, then move everything away. You usually won’t teach with a window in the frame because of lighting issues, but it really depends on the orientation of your window.
2. Lighting
When you shoot, make sure that you don’t have light behind you because it will flood the camera’s sensors and may make you look dark. For this reason, you usually won’t teach with a window in the frame behind you, unless you are sure the light won’t blow out the camera (exceptions: on YouTube, Yoga with Adrienne teaches against a window and it looks great). For this reason, you often won’t put a bright lamp in the frame with you, as it may cause you to look darker. You want to be well lit from the front and sides. Natural light can be amazing (if you are opposite a window), as long as you’re teaching in a time when the light won’t change dramatically.
Although I’m frankly a fan of warm lighting, “daylight” LED lights mimic the sun most closely, so you pop a few of those lights into your house lamps and see how it looks. Newer mobile phones (like the iPhone 11) have amazing cameras and light sensors that can accommodate a wide variety of environments. In yoga, we turn a lot. So before you shoot, do a test shoot in the space where you practice a few differently facing poses to make sure that you don’t go dark when you turn a certain way.
3. Audio, audio, audio
Audio is where most videos fall apart, and this is where you may need to invest if you want to do this long term. When students practice with you, their key connection is not visual; it’s audio. Bad audio will be very distracting and cause them to tune out.
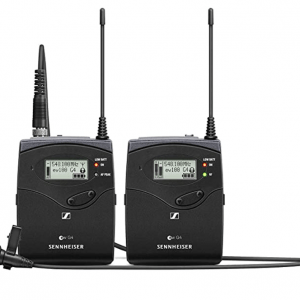
While there are mics out there that will connect directly into your iPhone port (via a lightning port), by getting a simple adapter you can vastly expand your option. The adapter (note the three rings around the plug rather than two) is called a TRS adapter) and it will connect your mic into the headphone jack of your iPhone (or more accurately, it plugs into the headphone jack iPhone adapter that you’re probably familiar with).
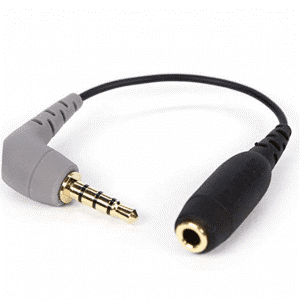
Using this adapter is not hard, but if you get the wrong one it won’t work. I’m also going to point you in the direction of an amazing resource over on YouTube: Primal Video. They are tech gods with lots of goodies. Here’s a video specifically on mics for mobile phones and adapters if you want to dive into this issue further.
Note on music: to keep audio simple, I’d recommend having your students play their own music (or – fun solution – create a Spotify playlist that is directly catered to your class and prompt your students to start it from home during the class) rather than trying to feed music into your live recording. To start, keep it simple.
4. Camera position
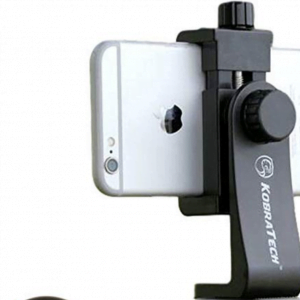
Obviously, where you put the camera is important as this will act as your audience’s eyes. You want to shoot in landscape (horizontally). Unless you have a lot of space in front of your mat, you’ll probably want to lay your mat horizontally so that you can see your whole body. You need to test the camera shot to make sure that is it capturing you fully (in other words, your hands don’t get cut off when you reach them overhead).
5. Teaching presence
Ironically, you can’t rely on your video. Here’s why:
- Students may not have a big enough computer (or phone) screen to see you clearly
- They won’t be able to see you most of the time (for example in forward-fold or downward-facing dogs)
- They won’t be able to see if you’re lifting your right or left leg easily (like in class), so you have to be incredibly specific in your cues
- You don’t want them to have to move their computer around during their practice to keep watching you
For all these reasons, you must lead your students verbally through the practice impeccably. Be very specific about rights/lefts, cueing directions, and transitions. Do not rely on the visual. It’s a great opportunity to refine your verbal cues.
Join Our Yoga Teacher Training And Main Event


